![CZT [CITI-ZEN-THEORY]](http://czt.rocks/cdn/shop/files/CZT_-_Brand_PINK_Label_1_330x.png?v=1774104725)
![CZT [CITI-ZEN-THEORY]](http://czt.rocks/cdn/shop/t/61/assets/CZT-Fast-Logo---Blue-Grey_330x.png?v=98224836737033641471695502660)
![CZT [CITI-ZEN-THEORY]](http://czt.rocks/cdn/shop/files/CZT_-_Brand_PINK_Label_1_170x.png?v=1774104725)
![CZT [CITI-ZEN-THEORY]](http://czt.rocks/cdn/shop/t/61/assets/CZT-Fast-Logo---Blue-Grey_170x.png?v=98224836737033641471695502660)
How the Screen Printing Process Works for Apparel
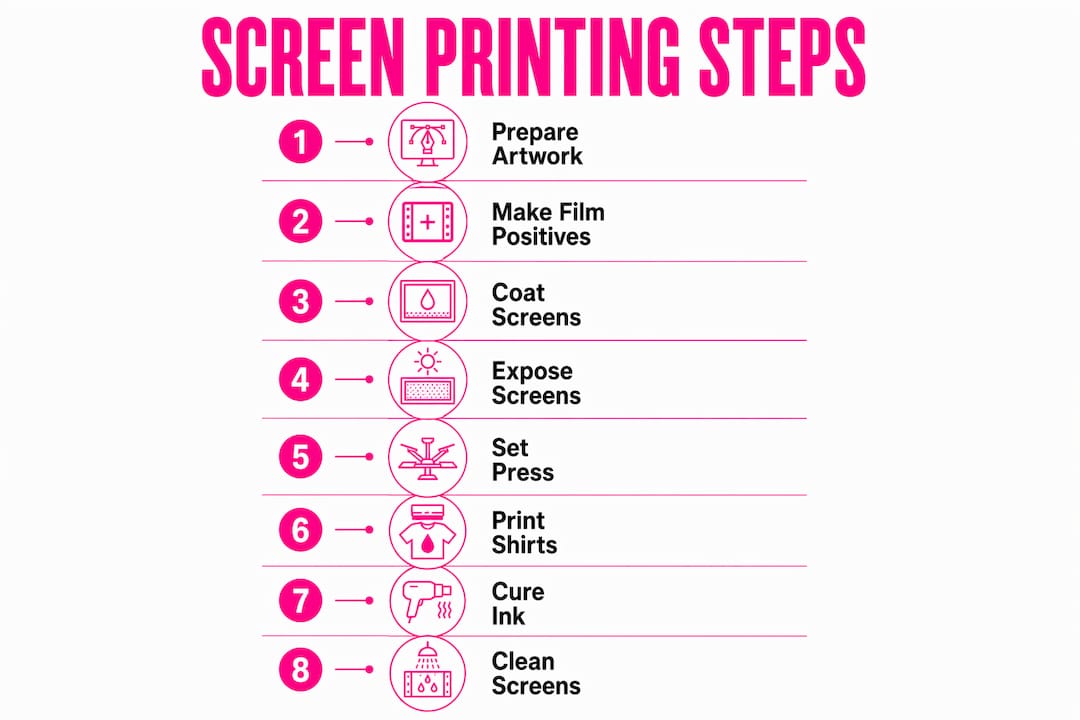
Apparel screen printing is a stencil-based craft where ink is pushed through a mesh screen onto fabric, one color at a time, using a squeegee, then permanently bonded to the garment through heat curing. The end-to-end workflow moves in a single, deliberate arc:
- Prepare artwork → create color separations → produce film positives → coat screen with photo-emulsion → expose with UV light → wash out stencil → register screens on press → print one color per pass (flash between passes when needed) → full cure → cleanup and reclaim
Two ink families dominate apparel work: plastisol, which sits on top of the fabric and cures at higher heat, and water-based ink, which absorbs into the fiber and requires airflow to cure properly. Both follow the same stencil logic. Garment printing accounts for a substantial share of U.S. screen printing activity, and once you understand the sequence, the craft reveals itself as methodical, repeatable, and deeply satisfying.
Table of Contents
- How do you prepare artwork for the screen printing process?
- What are film positives and how do you make them?
- How do you select and prepare screens for apparel work?
- How do you expose a screen and create the stencil?
- How do you set up the press and register multiple colors?
- How do you actually print a shirt, pass by pass?
- Flash drying vs. full curing: what is the difference?
- How do you clean screens and reclaim them for reuse?
- What causes common screen printing problems, and how do you fix them?
- How long does a hobbyist print run take, and what does it cost?
- What safety practices should every beginner follow?
- Czt’s design perspective: composition, placement, and artwork tips
- Key Takeaways
- Why design discipline is the real foundation of great apparel printing
- Useful sources and next-step reading
How do you prepare artwork for the screen printing process?
Artwork quality shapes every downstream result. Poor resolution, ragged edges, or unexpanded type will produce a soft, blurry stencil regardless of how carefully you coat or expose the screen. Start with vector artwork whenever possible, since vectors scale without degradation. Raster images must be at least 300 DPI at final print size, cleaned of compression artifacts, and converted to spot colors rather than CMYK gradients.
For multi-color apparel designs, each color requires its own film positive and its own screen. A three-color design means three separate files, each showing only the areas where that single ink will print. This is called color separation, and it is where many beginners underestimate the complexity.
Practical artwork checklist:
- Size artwork to final print dimensions before separating (common adult chest placement: 10"–12" wide; back: 12"–14" wide)
- Work in spot color mode (Pantone or custom swatches), not RGB or CMYK
- Set resolution to 300 DPI minimum for line art; 400–600 DPI for halftone work
- Add registration marks outside the image area on every separation layer
- Name files with color and layer order (e.g., “shirt_front_color1_white.pdf”)
- Keep bleed margins at least 0.5" from garment seams and collar
Halftones are worth a separate note. Photographic or gradient artwork must be converted to halftone dots before output, because screen printing cannot print continuous tone. The dot size and frequency (lines per inch, or LPI) must match your mesh count. A 110-mesh screen handles coarser halftones; finer meshes above 200 can hold tighter dot patterns.
Pro Tip: Before making film positives, run a preflight check for three common traps: strokes thinner than 1 point (they will fill in or disappear on screen), type that has not been expanded to outlines (font substitution will ruin the stencil), and low-contrast edges where two colors nearly match in value (they will bleed into each other on press).
Secondary artwork checklist for multi-color jobs:
- Confirm each separation prints only its assigned color with no overlap bleed
- Verify registration marks are identical in position across all layers
- Print a composite proof at 100% scale before committing to film
What are film positives and how do you make them?
A film positive is a transparency that carries your artwork in solid, opaque black. During screen exposure, the opaque areas block UV light and protect the emulsion beneath them, creating the open stencil through which ink will pass. If the black is not fully opaque, UV light bleeds through and hardens emulsion where you need it to wash out, producing soft or missing detail.
Output film positives at 1,200 DPI or higher for line art. Halftone work benefits from 2,400 DPI to preserve dot integrity. LPI for halftones typically runs 35–55 LPI for coarser mesh work and up to 65 LPI for finer screens. Most hobbyists use an inkjet printer with transparency film and RIP software, or they outsource film output to a local print shop.
Film positive checklist:
- Print on matte inkjet transparency film, not glossy (matte accepts ink more evenly)
- Test opacity by holding the film up to a bright light; no light should pass through the black areas
- If light bleeds through, double-print: run the film through the printer twice, aligned precisely
- Include registration marks and a color label on every positive
- Store flat in a light-safe sleeve until ready to expose
- Avoid fingerprints on the emulsion-contact side; oils cause pinholes
Edge quality matters as much as opacity. A ragged or semi-transparent edge on the film will translate directly into an undercut stencil edge, producing fuzzy print lines that no amount of squeegee technique can correct.
Screen printing basics reminder: Every film positive represents exactly one color. A five-color design requires five separate, correctly labeled film positives.
How do you select and prepare screens for apparel work?
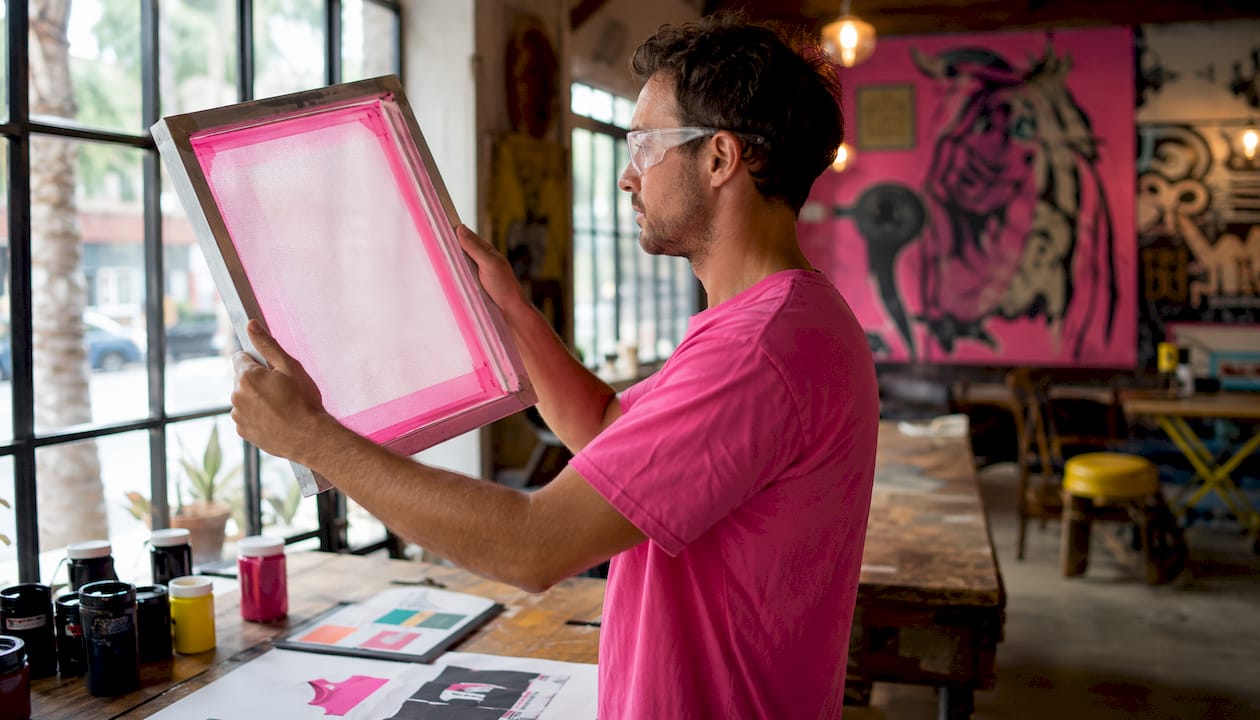
Mesh count is the single most consequential variable in screen selection. It controls how much ink passes through the screen and how much fine detail the stencil can hold. Lower mesh counts deposit more ink and handle coarser artwork; higher counts deposit less ink and resolve finer detail.
| Mesh Count | Typical Use | Ink Type |
|---|---|---|
| 60–75 | Glitter, specialty inks, heavy discharge | Specialty |
| 110 | General plastisol on dark garments, underbase white | Plastisol |
| 160 | Standard apparel work, most spot-color jobs | Plastisol / water-based |
| 200 | Fine detail, simulated process, halftone work | Plastisol |
| 280 | Very fine halftones, four-color process | Plastisol (thin) |
Frames come in aluminum or wood. Aluminum holds tension better over time and resists warping from moisture, making it the preferred choice for any serious hobbyist. Wood frames are cheaper to start with but can bow after repeated washouts. For adult tee chest prints, a 16"×16" frame gives adequate buffer around a standard 10"–12" image. Youth prints work well on 12"×12" frames; small placements like sleeve hits or hem tags fit a 7"×7" frame.
Emulsion choice pairs with both mesh and ink type. Dual-cure emulsions (combining diazo and photopolymer) offer a wide exposure latitude and good durability for plastisol inks. Pure photopolymer emulsions expose faster and hold finer detail. Capillary film provides a precise, uniform emulsion over mesh (EOM) thickness, which matters for ink deposit consistency on performance fabrics.
Pre-press screen preparation:
- Degrease new and reclaimed screens with a dedicated screen degreaser, rinse thoroughly, and allow to dry completely before coating
- Use a scoop coater that is 2"–3" narrower than the inside frame dimension for even, controlled emulsion application
- Apply one coat on the squeegee side and one on the substrate side; pull slowly and at a consistent angle
- Dry coated screens horizontally in a light-safe cabinet, substrate side down, at room temperature
Pro Tip: Coat screens the evening before your exposure session. Fully dried emulsion exposes more consistently and holds finer detail than emulsion that is still slightly damp.
How do you expose a screen and create the stencil?
Exposure is where the stencil is born, and it is also where most beginners lose detail or create pinholes. The exposure process is sensitive to variables that are easy to overlook: screen dryness, contact quality between film and emulsion, and even tiny air gaps that allow UV light to scatter under the film’s edges.
Step-by-step exposure workflow:
- Confirm the coated screen is fully dry; any residual moisture will cause soft, weak emulsion.
- In a light-safe area, place the film positive emulsion-side down against the screen’s substrate side (the side that contacts the garment).
- Use a vacuum exposure unit or a weighted glass sheet to achieve full, even contact between film and emulsion. Air gaps cause undercutting.
- Expose for the calibrated time for your specific emulsion, mesh, and lamp combination.
- Immediately after exposure, rinse the screen with cool water on both sides; the unexposed emulsion (under the opaque film areas) will wash away, leaving open mesh.
- Inspect the stencil under bright light for pinholes, fuzzy edges, or incomplete washout.
- Allow the screen to dry completely before printing.
Because lamp output, emulsion batch, and mesh tension all vary, shops calibrate exposure with test strips or wedge tests rather than relying on a single fixed time. A wedge test exposes a single screen in incremental time steps across its width, then washes out to reveal which exposure duration produces the sharpest, most complete stencil. Run one for every new emulsion batch or lamp.
Post-exposure checklist:
- Hold the screen up to a light source; pinholes appear as bright spots and must be blocked with emulsion or screen filler before printing
- Check stencil edges for crispness; fuzzy edges indicate underexposure or poor film contact
- Confirm all fine detail has washed out cleanly; if detail is filling in, the screen is overexposed
Pro Tip: If you are using a DIY light source (a UV lamp or even sunlight), exposure times will vary dramatically with distance, intensity, and ambient temperature. Always run a wedge test before committing a full screen.
How do you set up the press and register multiple colors?
Registration is the discipline that separates a professional-looking multi-color print from a muddy, misaligned one. Each color requires its own screen, and each screen must be positioned so its ink lands precisely where the artwork dictates, every single print.
Press setup checklist:
- Apply pallet adhesive to the platen and allow it to tack slightly before loading garments; too much adhesive causes garments to tear on removal, too little allows shifting
- Set off-contact (snap-off) distance between screen and platen at approximately 1/16"–1/8"; this allows the screen to peel away cleanly after each stroke
- Lock the first screen (typically the underbase or the most dominant color) into the press arms
Step-by-step registration sequence:
- Load a test garment or a piece of pelon (non-woven interfacing) onto the platen.
- Lower the first screen and make a test print.
- Inspect the print against a printed composite proof or a transparency overlay.
- Use the press’s micro-registration adjusters to shift the screen in small increments until the print aligns with the registration marks.
- Lock the screen firmly and repeat the process for each additional color, checking alignment against the previous color’s print.
- Run three to five test prints on pelon before moving to garments; check all colors together.
Pro Tip: Print your registration marks in a light color on the first test garment and use them as a visual reference for every subsequent screen. Marks outside the print area can be covered by the garment’s hem or masked after the run.
Between colors, check that the platen adhesive has not picked up lint or fibers that could lift the next garment out of position. A quick pass with a lint roller keeps the platen clean and registration consistent through a long run.
How do you actually print a shirt, pass by pass?
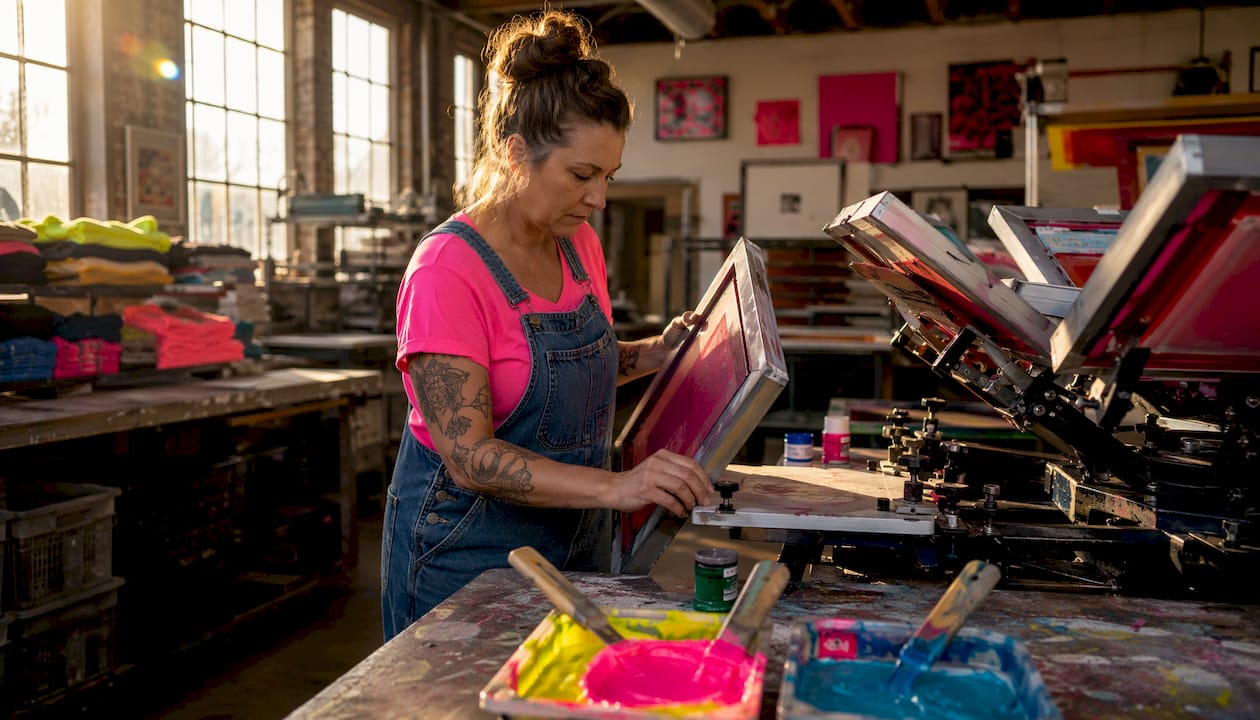
The print stroke is a two-part motion: flood, then print. The flood stroke pushes ink across the screen to fill the open mesh without pressing it through. The print stroke applies controlled downward pressure and pulls the squeegee across the screen at a consistent angle, forcing ink through the open stencil onto the garment below.
Step-by-step print pass sequence:
- Flood the screen with ink using a light, even flood stroke before the first print.
- Load a garment onto the platen, centered and flat.
- Lower the screen to print position.
- Pull the squeegee at an angle that allows firm, even pressure in a single smooth stroke.
- Lift the screen; the garment should release cleanly as the screen snaps off.
- If a second pass is needed for coverage, re-flood and repeat without moving the garment.
- Flash cure the ink if printing a second color on top, then load the next screen.
Squeegee durometer (hardness) affects ink deposit. Medium hardness blades are versatile; softer blades deposit more ink, while harder blades deposit less and produce sharper edges on fine detail. Angle and speed interact: a more upright angle with faster speed deposits less ink; a lower angle with slower speed deposits more.
For dark garments, an underbase white is printed first, flash cured to a gel state, and then the color layers print on top of it. This is what makes colors appear vibrant on black or navy fabric rather than muted and transparent.
QC checklist for the first 10 prints:
- Check registration against your composite proof after prints 1, 3, and 10
- Inspect ink coverage for holidays (thin spots) or flooding (excess ink bleed)
- Confirm edge crispness has not degraded (a sign of screen breakdown or ink drying in mesh)
- Verify garments are releasing cleanly from the platen without distortion
Pro Tip: Slow down your stroke speed when printing fine halftones or tight detail. Speed is the enemy of dot integrity. A controlled, deliberate stroke at moderate pressure will outperform a fast, heavy one every time.
Flash drying vs. full curing: what is the difference?
Confusing flash with cure is one of the most consequential mistakes in apparel screen printing, and it is more common than most beginners expect. Flash drying brings ink to a gel state: the surface feels dry to the touch, but the ink has not fused with the fabric. Full curing is a separate, final process where the entire ink film reaches fusion temperature and bonds permanently to the garment fibers.
Temperature guidance by ink type:
- Plastisol (standard): full cure at 300–330°F through the entire ink film
- Low-cure plastisol: full cure at approximately 260°F, useful for heat-sensitive fabrics
- Water-based and discharge inks: require forced airflow in addition to heat; cure temperatures vary by formulation, so always consult the ink’s technical data sheet
- Flash/gel stage (all ink types): surface temperature of approximately 180–250°F; the ink is stabilized but not cured
Critical distinction: A print that feels dry after flashing can still wash out completely if the ink core never reached fusion temperature. This is the hidden failure mode that ruins entire print runs.
The most reliable way to verify cure is a donut-probe thermocouple placed in the wet ink film as it passes through the dryer. An infrared gun reads surface temperature only, which can be significantly higher than the ink core. Wash tests (3–5 full wash cycles) remain the definitive field verification.
Pro Tip: Over-flashing is as damaging as under-flashing. If the ink surface becomes too hard between passes, subsequent colors will not bond properly, and the print hand becomes stiff and brittle. Flash just until the ink is dry to the touch and no longer tacky.
How do you clean screens and reclaim them for reuse?
A well-maintained screen can be reclaimed and reused dozens of times. The cleanup workflow differs slightly between plastisol and water-based inks, but the principle is the same: remove ink promptly, then strip emulsion completely.
Step-by-step cleanup and reclaim:
- Scrape excess ink back into the ink container with a palette knife or squeegee before it dries.
- For plastisol: apply a plastisol-compatible screen wash or ink degradant to both sides of the screen; agitate with a brush and rinse with a pressure washer or hose.
- For water-based inks: rinse immediately with water before the ink dries; dried water-based ink is significantly harder to remove and can permanently clog mesh.
- Apply emulsion remover (also called reclaimer) to both sides of the screen; allow it to dwell for the manufacturer’s recommended time.
- Agitate with a stiff brush, then rinse thoroughly with a pressure washer.
- Apply a degreaser/haze remover if ghost images remain in the mesh.
- Rinse completely, inspect the mesh for residual emulsion or ink haze, and allow to dry before recoating.
Safety is non-negotiable throughout this process. Screen wash solvents and emulsion removers require adequate ventilation; work outdoors or in a space with active exhaust. Wear nitrile gloves and eye protection when handling reclamation chemicals. Rinse water containing emulsion and ink residue should be managed according to your local municipality’s wastewater regulations; many areas prohibit direct drain disposal of screen printing chemicals without treatment.
Daily/weekly press maintenance checklist:
- Wipe down platen surfaces and press arms after every session
- Inspect squeegee blades for nicks or uneven wear; a damaged blade edge creates streaks
- Check press arm bearings and registration locks for play or looseness
- Store screens flat or vertically in a dry, light-safe area
What causes common screen printing problems, and how do you fix them?
| Problem | Likely Cause | Fix |
|---|---|---|
| Pinholes in print | Pinholes in stencil from dust or underexposure | Block pinholes with screen filler; re-expose with better film contact |
| Fuzzy or soft edges | Underexposure or poor film-to-emulsion contact | Run wedge test; use vacuum frame or weighted glass for contact |
| Registration drift | Loose screen lock or platen adhesive failure | Re-lock screen; reapply pallet adhesive; check press arm play |
| Ink pickup (garment sticking to screen) | Insufficient off-contact or over-flashing | Increase snap-off distance; reduce flash time |
| Cracking after wash | Under-cured ink | Verify cure with donut probe and wash test; increase dryer time/temp |
| Ink bleeding under stencil | Excessive squeegee pressure or low viscosity | Reduce pressure; add curable reducer or thickener to ink |
| Mesh breakdown mid-run | Overexposure or incompatible solvent | Check exposure; use only mesh-safe cleaners |
When a problem appears, work through checks in a deliberate order rather than adjusting multiple variables at once. Print a test, inspect the screen, review your exposure test strips, then adjust press or ink. Changing two things simultaneously makes it impossible to identify which fix actually worked.
Pro Tip: Keep a print log for every job: mesh count, emulsion, exposure time, ink brand and color, squeegee durometer, and cure settings. When something goes wrong, the log lets you isolate the variable that changed rather than guessing.
How long does a hobbyist print run take, and what does it cost?
A realistic timeline for a small hobbyist run of 12–24 T-shirts, assuming screens are already coated and artwork is ready:
Typical time breakdown:
- Art preflight and film positive output: 30–60 minutes
- Screen exposure and washout (per screen): 20–30 minutes
- Press setup and registration: 30–60 minutes for a two-color job
- Print run (12–24 shirts, two colors): 45–90 minutes
- Curing (conveyor dryer or heat gun): 15–30 minutes
- Cleanup and screen reclaim: 30–45 minutes
Total: roughly 3–5 hours for a two-color, 12-shirt run.
Starter budget ranges (entry-level hobbyist setup):
- Single-color tabletop press or DIY hinge clamp: $50–$200
- UV exposure unit (entry-level): $150–$400, or DIY with UV bulbs for less
- Aluminum screens (set of 4): $60–$120
- Plastisol ink starter set: $40–$80
- Squeegees, scoop coater, emulsion, chemicals: $60–$100
- Flash dryer or heat gun: $30–$150
Per-shirt cost components on a 24-shirt run: blank garment ($3–$8), ink and consumables ($0.50–$1.50), and amortized setup time. Outsourcing film positives to a local print shop ($5–$15 per film) often makes sense for first-time printers who lack a calibrated inkjet setup. For alternative decoration methods that suit smaller runs or complex photographic designs, heat transfer printing is worth understanding as a complement to screen printing.
Cost-saving habits that compound over time: reuse screens by reclaiming promptly, batch same-size jobs to minimize press setup changes, and optimize ink layout to reduce waste between colors.
What safety practices should every beginner follow?
Screen printing involves UV light, heat, solvents, and chemical emulsions. None of these are acutely dangerous when handled correctly, but each demands consistent attention.
Essential PPE and ventilation:
- Nitrile gloves (not latex) for all chemical handling: emulsion, reclaimer, screen wash, and ink
- Safety glasses or goggles when using pressure washers or chemical sprays
- Respirator rated for organic vapors when using solvent-based screen wash in enclosed spaces
- Active ventilation (exhaust fan or open windows) during all chemical work and curing
Quality checks before and during production:
- Run a wash test on a sample print before committing to the full run; 3–5 wash cycles reveal under-cure before it becomes a customer complaint
- Verify registration on the first three prints of every new screen setup
- Check cure temperature with a donut probe or calibrated contact thermometer, not an IR gun alone
For sustainable fabric choices like recycled polyester or blended blanks, confirm ink compatibility before printing; some plastisol formulations cause dye migration on polyester, requiring a low-bleed or low-cure ink.
Chemical disposal is a local regulatory matter. Emulsion, reclaimer, and solvent rinse water must be managed according to your municipality’s wastewater rules. Many areas require neutralization or collection before drain disposal. Consult your local environmental agency or waste hauler for the specific requirements in your area.
This article is general educational information, not professional safety or legal advice. Confirm current chemical handling and disposal regulations with your local authority or a qualified professional for your specific situation.
Czt’s design perspective: composition, placement, and artwork tips
Placement precision is where composition becomes craft. For adult tees, a standard chest print sits below the collar, centered, with width suited to the garment size. Back prints are sized and positioned proportionally below the collar seam. Sleeve prints and hem tags are sized to fit their locations suitably.
Composition principles for screen printing:
- Limit color count to three or fewer for your first several jobs; each additional color multiplies setup complexity and registration risk
- Prioritize contrast over subtlety; screen printing rewards bold, graphic compositions more than delicate gradients
- Treat halftones as a tool, not a default; a well-drawn spot-color design often reads more powerfully on a garment than a photographic halftone
- Test minimum halftone dot size on your chosen mesh before committing to a full run; dots that hold on film may fill in on a 110-mesh screen
Design-for-print rules:
- Expand all type to outlines before output; font substitution at the film stage is irreversible
- Avoid strokes thinner than 1.5 points; they will either fill in or disappear depending on mesh and ink viscosity
- For typography-driven designs, test legibility at actual print size before making screens
Pro Tip: When printing on recycled or blended blanks, which Czt prioritizes for its own collections, choose water-based inks for a softer hand that complements the fabric’s natural texture. Plastisol sits on top of the fiber; water-based ink becomes part of it. On a recycled cotton-poly blend, that distinction is felt with every wear.
Czt’s approach to one-of-a-kind apparel design consistently returns to a single principle: the garment is the canvas, and the print must serve the composition of the whole piece, not just fill available space. Placement, scale, and color restraint are the variables that separate a memorable garment from a forgettable one.
Key Takeaways
Screen printing apparel is a stencil-based, one-color-per-screen process where artwork quality, exposure precision, and full ink cure determine whether a print survives the first wash or the fiftieth.
| Point | Details |
|---|---|
| One screen per color | Every color in a design requires its own film positive, coated screen, and registration pass. |
| Exposure calibration matters | Run a wedge test for each new emulsion batch; never rely on a fixed exposure time across different setups. |
| Flash is not cure | Flash gels ink at 180–250°F; full plastisol cure requires 300–330°F through the entire ink film. |
| Verify cure before the run | Use a donut-probe thermocouple and run 3–5 wash cycles on a test print before committing to production. |
| Artwork quality is foundational | Low-resolution or improperly prepared artwork produces poor stencils that no press technique can correct. |
Why design discipline is the real foundation of great apparel printing
There is a tendency, especially among beginners, to treat screen printing as primarily a technical problem: get the exposure right, get the registration tight, get the cure temperature correct. And those things matter enormously. But what we have come to understand at Czt, through years of working at the intersection of streetwear culture and sustainable craft, is that the technical steps are only as good as the design decisions that precede them.
A print job with three well-chosen colors, composed with genuine attention to placement and contrast, will outperform a six-color job with mediocre artwork every single time. The press does not lie. It reproduces exactly what you give it, at scale, on fabric that people will wear against their skin and carry into the world. That is a responsibility worth taking seriously.
We enforce one rule on every Czt print job: the design must work in one color before we add a second. If the composition collapses without the second color, the artwork needs more work, not more ink. This discipline keeps our color counts low, our registration manageable, and our prints legible at the distances and angles at which people actually see clothing. It also keeps our ink consumption honest, which matters when you are committed to sustainable production on recycled blanks.
For anyone beginning this craft, the most valuable investment is not a better press or a more expensive exposure unit. It is time spent learning to see your artwork the way the screen will reproduce it: as a stencil, not a painting.
Useful sources and next-step reading
The following references cover the technical depth that a single article cannot fully contain. Consult them when you need specific guidance on exposure calibration, cure verification, or ink formulation.
- Exposure calibration and wedge testing: Emulsion manufacturer technical data sheets (TDS) are the primary source; the DP-800 technical data is a useful reference for understanding per-emulsion calibration logic.
- Ink cure temperatures and verification: The Battle Born Clothing ink curing guide covers donut-probe vs. IR gun methodology and wash test protocols in practical detail.
- Flash vs. full cure: The Broken Arrow Wear flash drying guide explains the gel-vs.-fusion distinction and common failure modes clearly.
- Emulsion exposure variables: The Battle Born Clothing emulsion exposure guide covers contact quality, air gaps, and undercut prevention.
- End-to-end beginner workflow: ScreenPrinting.com’s how-to-print-t-shirts guide and their how-to-screen-print overview are reliable, practical references for the full sequence.
- DIY frame sizing and home setup: The Instructables DIY T-shirt screen printing guide provides practical frame size examples for hobbyists.
-
Czt design and personalization resources:
- How to incorporate personal artwork into clothing
- Types of custom clothing personalization options explained
- Why longevity defines sustainable clothing
Recommended
- How Board Graphics Influence Clothing: A Designer’s Guide – CZT [CITI-ZEN-THEORY]
- How Heat Transfer Printing Works on Clothing – CZT [CITI-ZEN-THEORY]
- How to Incorporate Personal Artwork into Clothing – CZT [CITI-ZEN-THEORY]
- Types of Custom Clothing Personalization Options Explained – CZT [CITI-ZEN-THEORY]