![CZT [CITI-ZEN-THEORY]](http://czt.rocks/cdn/shop/files/CZT_-_Brand_PINK_Label_1_330x.png?v=1774104725)
![CZT [CITI-ZEN-THEORY]](http://czt.rocks/cdn/shop/files/CZT_-_Brand_PINK_Label_1_170x.png?v=1774104725)
How Heat Transfer Printing Works on Clothing
Heat transfer printing is defined as the process of bonding a design permanently onto fabric by applying calibrated heat and pressure to a specialized transfer material. The three primary transfer materials are heat transfer vinyl (HTV), sublimation paper, and Direct-to-Film (DTF) film. Understanding how heat transfer printing works on clothing opens up a world of creative possibility, whether you are customizing a single streetwear piece or producing a short run of expressive, culture-driven garments. At its core, the heat transfer printing process costs approximately $1 to $3 per print, making it one of the most accessible decoration methods for independent designers and small brands alike.
How heat transfer printing works on clothing: the main methods
Three distinct methods define the field, and each one carries its own aesthetic character, technical demand, and fabric affinity.
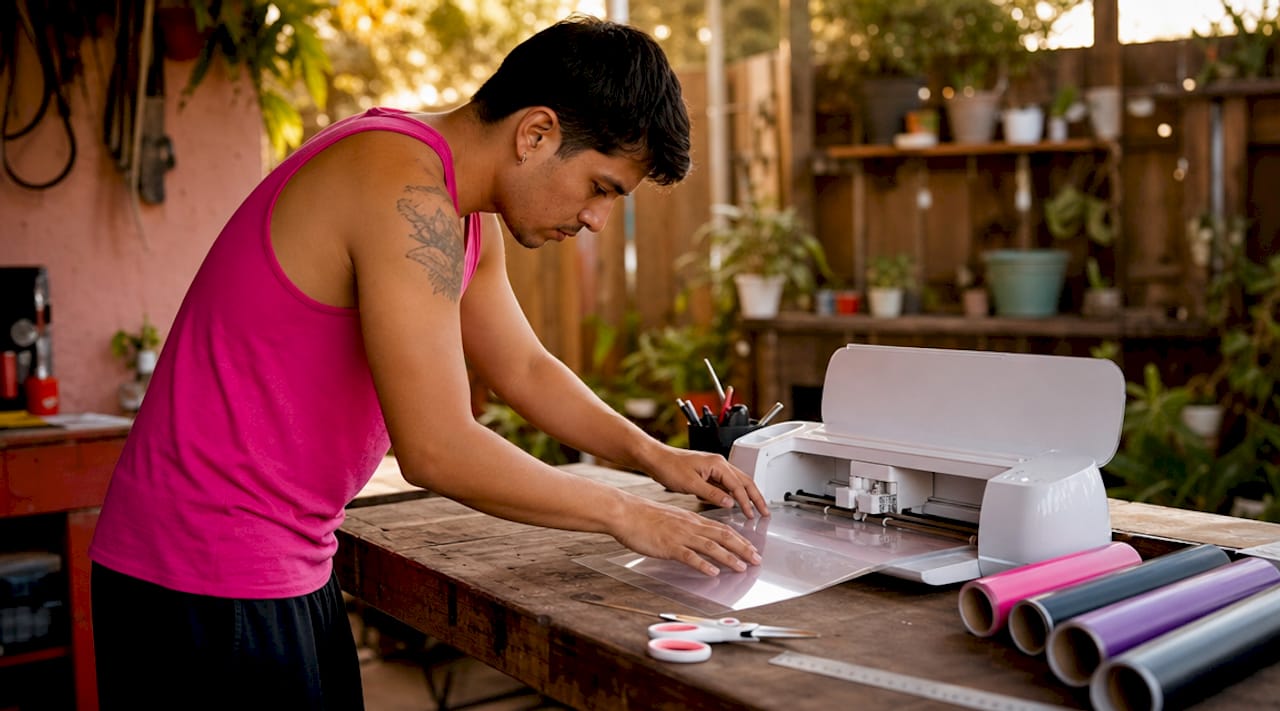
Heat Transfer Vinyl (HTV) is the most tactile and graphic of the three. A cutting machine like a Cricut or Silhouette Cameo slices the design from a vinyl sheet, the excess material is weeded away by hand, and the remaining graphic is pressed onto the garment. The result is a slightly raised, matte or glossy surface with a feel that is unmistakably physical, almost sculptural. HTV works beautifully on cotton and cotton blends, and it is the method most associated with bold, single-color streetwear graphics.
Sublimation printing takes a fundamentally different approach. Heat converts dye into a gas that penetrates polyester fibers and solidifies inside them, producing a print that has no surface texture at all. Because the dye must enter the fiber itself, sublimation is limited to polyester or polyester-coated substrates. The color vibrancy is extraordinary, and the print will not crack or peel because it is literally part of the fabric.
Direct-to-Film (DTF) printing is the newest and arguably most versatile of the three. DTF transfers use a TPU adhesive powder that creates a cured adhesive layer capable of bonding to cotton, polyester, nylon, leather, and blends, with prints lasting 50 or more wash cycles under proper care. This flexibility makes DTF the preferred method for complex, multi-color compositions on diverse fabric types.
| Method | Best fabrics | Color complexity | Durability |
|---|---|---|---|
| Heat Transfer Vinyl (HTV) | Cotton, blends | Simple, bold graphics | High with correct application |
| Sublimation | Polyester, poly-coated | Unlimited, photographic | Excellent, no surface layer |
| Direct-to-Film (DTF) | Cotton, poly, nylon, leather | Unlimited, full-color | 50+ wash cycles |
Each method rewards a different creative sensibility. HTV suits the graffiti-influenced, hard-edged aesthetic. Sublimation suits all-over photographic compositions. DTF suits anyone who wants photographic detail on a cotton tee.
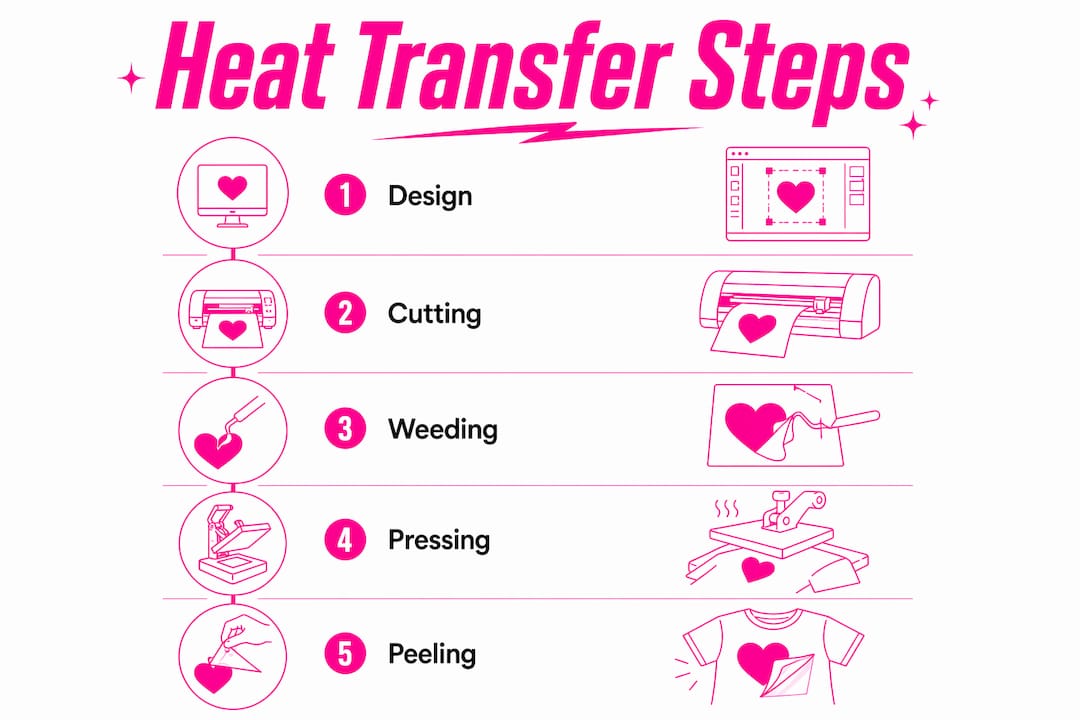
How does the heat transfer printing process work step by step?
The workflow is more deliberate than most beginners expect, and each stage compounds on the last.
-
Design preparation. Artwork must be created at a minimum 300 DPI resolution with a recommended maximum print size of 10 to 12 inches. For HTV and light-fabric paper transfers, the design must be mirrored before cutting or printing. For inspiration on how nature-inspired compositions translate into wearable art, exploring pattern design examples can sharpen your visual instincts before you commit a design to vinyl or film.
-
Cutting and weeding (HTV only). The cutting machine traces the design with a blade set to the correct depth and pressure for the specific vinyl type. Improper blade settings damage or leave incomplete designs, which is why blade depth and force must be calibrated to the vinyl’s thickness. After cutting, weeding removes every piece of vinyl that is not part of the final graphic.
-
DTF printing and powder curing. In DTF, CMYK ink layers print first, followed by white ink on top, because the design flips during pressing and the white layer ends up underneath, blocking the garment’s base color from dulling the design. TPU adhesive powder is then applied to the wet ink and cured in an oven, a step called gelling, which ensures uniform adhesive distribution and prevents warping during storage.
-
Fabric preparation. Place the garment on the heat press platen and perform a 3 to 5 second pre-press. This removes invisible moisture and flattens fiber texture, both of which cause steam pockets and adhesion failures if left unaddressed. Skipping this step is the single most common reason beginner prints bubble or peel within a few washes.
-
Heat press application. Position the transfer on the garment, cover with a silicone sheet or parchment paper, and apply heat and pressure according to the transfer type. Vinyl transfers require 350 to 375°F for 45 to 60 seconds, while DTF transfers need 320 to 338°F for 10 to 15 seconds. These are not suggestions. Deviating from these parameters produces prints that either fail to bond or scorch the fabric.
-
Peeling and finishing. Hot peel transfers must be peeled immediately while hot; cold peel transfers require complete cooling before the carrier sheet is removed. Peeling at the wrong temperature causes cracking, incomplete adhesion, or a sticky surface. Always read the manufacturer’s peel instructions for the specific product you are using.
Pro Tip: Allow DTF transfers to dry for 2 to 3 minutes after printing and before applying adhesive powder. Rushing this step causes uneven powder distribution and patchy adhesion.
What factors determine durable, high-quality heat transfer prints?
Print longevity is not an accident. It is the product of three variables controlled in sequence: temperature, time, and pressure.
A commercial heat press delivers consistent, calibrated pressure across the entire platen. A household iron cannot. Professional print quality requires calibrated heat and pressure, and irons produce uneven contact that leads to durability failures, particularly at the edges of a design. For anyone serious about custom clothing, a dedicated heat press is not optional equipment.
Choosing the correct transfer for your fabric color is equally consequential. Using a light-fabric transfer on a dark shirt produces an invisible or washed-out print, while failing to weed excess vinyl leaves unwanted white borders around the design. These are not subtle errors. They are the difference between a garment that communicates intention and one that communicates carelessness.
Post-press care extends the life of any heat transfer print significantly. Proper post-pressing embeds the ink deeper and softens the finish, improving both washability and hand feel. Washing printed garments inside out in cold water, and avoiding high-heat dryer cycles, preserves the transfer through many more wears.
Key quality checkpoints to build into every session:
- Pre-press the garment for 3 to 5 seconds before every application
- Verify temperature, time, and pressure settings against the transfer manufacturer’s specifications
- Use the correct transfer type for the fabric’s base color (light vs. dark)
- Follow hot peel or cold peel instructions precisely, without improvising
- Wash finished garments inside out in cold water to extend print life
Pro Tip: After pressing, place a clean silicone sheet over the finished print and press again for 5 seconds with light pressure. This post-press step smooths the surface and significantly improves wash durability.
Which fabrics work best with heat transfer printing?
Fabric choice shapes the entire character of a heat transfer print, from its visual depth to how it feels against the skin after a dozen washes.
Heat transfer printing works best on cotton, polyester, blends, denim, canvas, and leather. Each of these substrates offers a surface that accepts adhesive or dye without resistance. Cotton is the most forgiving and the most culturally resonant for streetwear. Polyester delivers the most vibrant sublimation results. Denim and leather add a textural contrast that makes graphic prints feel intentional and artful.
A 65/35 polyester/cotton blend balances comfort and print durability, reducing shrinkage and ink deformation through repeated washing. For anyone designing performance-driven pieces or garments meant to move with the body, this blend is the most practical starting point. Czt’s approach to recycled fabric options demonstrates how eco-conscious material choices and heat transfer compatibility can coexist without compromise.
Fabrics to avoid include those with waterproof coatings, silicone treatments, or heavy wax finishes. These surfaces resist adhesive bonding at the molecular level, and no amount of heat or pressure will produce a lasting result. Nylon works well with DTF but requires lower temperature settings to prevent heat damage to the fiber structure. Natural fibers like linen and wool can accept HTV transfers but demand careful temperature management, since both scorch at lower thresholds than cotton.
The relationship between fabric weight and print feel is worth considering deliberately. Heavier fabrics, like a 14-ounce canvas or a structured denim, give HTV graphics a more architectural presence. Lighter jersey knits allow the print to move with the fabric, which suits flowing, all-over sublimation compositions. Understanding what custom fit means for a garment informs not just the silhouette but the printing method that will honor the design most faithfully.
Czt’s perspective: what we’ve learned from printing on fabric we actually care about
We have pressed a lot of transfers onto a lot of garments, and the lesson that took longest to absorb is this: the press is only as honest as the fabric beneath it. You can have the most aesthetically intriguing composition, the most precisely cut vinyl, the most technically correct DTF film, and still produce a mediocre result if the garment itself is indifferent material.
What we have found is that investing in a reliable commercial heat press, something like a Hotronix or a Stahls’ unit, changes the entire quality ceiling of your work. The calibration is the craft. Beginners gravitate toward household irons because they are accessible, but the uneven pressure distribution creates a kind of visual dishonesty in the finished piece, edges that lift, colors that fade unevenly, designs that communicate effort rather than intention.
DTF has genuinely changed what is possible for small-run, multi-color work. The ability to press a photographic-quality composition onto a cotton garment, with no minimum order and no screen setup, is a creative freedom that screen printing simply cannot offer at the same scale. We lean on it for complex compositions where the design demands full-color fidelity.
The beginner mistake we see most often is skipping the pre-press. It feels like a redundant step until the first time a print bubbles off a garment after two washes, and then the lesson is permanent. Press the fabric first. Always.
— CZT
Bring your custom designs to life with Czt
Understanding the heat transfer printing process is only the beginning. The garment you choose to print on carries equal weight in the final composition. Czt’s fashion shirts and streetwear pieces are crafted from materials that accept heat transfers with integrity, including recycled and organic fabrics that align with the values of designers who care about what their clothing is made from. For performance-driven custom work, the Tribal Basketball Jersey offers an eco-friendly substrate built for bold graphic application. Explore the full Czt range and bring your heat transfer designs to fabric that deserves them.
FAQ
What is heat transfer printing on clothing?
Heat transfer printing is the process of bonding a design onto fabric using heat and pressure applied to a transfer material such as vinyl, sublimation paper, or DTF film. The transfer material carries the design and releases it permanently onto the garment surface under controlled conditions.
What temperature is needed for heat transfer vinyl?
Vinyl transfers require 350 to 375°F applied for 45 to 60 seconds with medium-to-firm pressure. DTF transfers use a lower range of 320 to 338°F for 10 to 15 seconds, with a 3 to 5 second pre-press before the main application.
Can you use heat transfer printing on any fabric?
Heat transfer printing works on cotton, polyester, blends, denim, nylon, canvas, and leather, but fails on waterproofed or silicone-coated fabrics that resist adhesive bonding. Fabric type also determines which transfer method produces the best result.
What is the difference between hot peel and cold peel transfers?
Hot peel transfers must be removed from the carrier sheet immediately after pressing while the material is still hot. Cold peel transfers require the garment to cool completely before peeling, and using the wrong technique causes cracking or incomplete adhesion.
Is DTF printing better than heat transfer vinyl?
DTF printing suits complex, multi-color designs on a wide range of fabrics, while HTV is better for bold, single-color graphics on cotton. DTF offers greater versatility across substrates; HTV delivers a more tactile, raised surface quality that suits certain streetwear aesthetics.
Key takeaways
Heat transfer printing produces durable, vibrant results when temperature, pressure, and transfer type are matched precisely to the fabric and design.
| Point | Details |
|---|---|
| Pre-press every garment | A 3 to 5 second pre-press removes moisture and prevents bubbling or peeling after washing. |
| Match transfer to fabric color | Light-fabric transfers on dark garments produce invisible prints; always use the correct transfer type. |
| DTF for complex designs | DTF transfers bond to cotton, polyester, nylon, and leather with 50+ wash cycle durability. |
| Use a commercial heat press | Household irons produce uneven pressure and reduce print longevity; calibrated presses are required for consistent results. |
| Follow peel instructions exactly | Hot peel and cold peel transfers fail when peeled at the wrong temperature; manufacturer instructions are not optional. |