![CZT [CITI-ZEN-THEORY]](http://czt.rocks/cdn/shop/files/CZT_-_Brand_PINK_Label_1_330x.png?v=1774104725)
![CZT [CITI-ZEN-THEORY]](http://czt.rocks/cdn/shop/t/61/assets/CZT-Fast-Logo---Blue-Grey_330x.png?v=98224836737033641471695502660)
![CZT [CITI-ZEN-THEORY]](http://czt.rocks/cdn/shop/files/CZT_-_Brand_PINK_Label_1_170x.png?v=1774104725)
![CZT [CITI-ZEN-THEORY]](http://czt.rocks/cdn/shop/t/61/assets/CZT-Fast-Logo---Blue-Grey_170x.png?v=98224836737033641471695502660)
Appliqué vs Embroidery: How to Choose the Right Technique
Embroidery builds an image from thread, stitch by stitch, which is why it renders fine detail, small text, and logos so cleanly. Appliqué builds an image from cut fabric, tacked and finished at the edges, which is why it dominates when you need bold color coverage across a large surface without loading the garment with stitches. One favors precision; the other favors presence. If you’re deciding which to use on a jacket back, a monogrammed towel, or a skate hoodie, the sections below cover the mechanics, the materials, the care routine, and the trade-offs that actually determine your choice.
- Fine detail, text, or logos: Embroidery wins.
- Large graphics, patches, or bold color blocks: Appliqué wins.
- Both at once: Embroidered appliqué, where satin stitching finishes a fabric shape, combines elements of both methods.
Key Takeaways
The technique that wins for you depends on whether your design needs thread-level precision (embroidery) or fabric-level coverage (appliqué), not on which one sounds more premium.
| Point | Details |
|---|---|
| Match method to detail | Embroidery handles fine text and logos; appliqué handles bold, large-scale graphics. |
| Stitch count drives cost | Appliqué scales with perimeter, not area, so it’s often faster and cheaper on big color blocks. |
| Prep prevents failure | Preshrink fabric and choose the right stabilizer before you stitch anything. |
| Tension tweaks matter | Adjusting bobbin tension on satin-border appliqué prevents a messy, exposed edge. |
| Drape depends on density | Dense embroidery fill can stiffen fabric; appliqué preserves flexibility better on recycled textiles. |
Table of Contents
- Applique vs Embroidery: Comparing the Two Techniques Step by Step
- Materials and Machine Settings You’ll Need for Each Method
- What Each Technique Looks and Feels Like on a Finished Piece
- Weighing Durability, Cost, and Comfort Before You Commit
- Choosing Techniques for Recycled Fabrics and Custom Couture
- Our Take on the Appliqué vs Embroidery Debate
- Sources
Applique vs Embroidery: Comparing the Two Techniques Step by Step
The two methods diverge at the very first step. Embroidery starts with digitizing, converting artwork into a stitch file that a machine reads, then stabilizing the fabric so it doesn’t pucker under dense fill or satin stitches. Every color and shape gets built from thread, which is why intricate crests, script lettering, and photorealistic logos default to embroidery. Appliqué skips most of that thread-building. A shape gets cut from fabric, positioned, tacked down with a straight or zigzag stitch, trimmed close to the edge, then finished with a satin or dense zigzag border that locks the raw edge in place.
That difference in construction changes everything downstream:
- Stitch count scales with detail, not size, in embroidery, so a small, complex logo can carry more stitches than a large, simple one.
- Appliqué scales with perimeter, not area, meaning a big solid-color shape needs stitching only around its border, not across its whole surface.
- Machine stops for placement and trimming add pauses to an appliqué run, but those pauses still add up to less total run time than filling the same area with thread.
Embroidery is the standard choice for fine detail, small text, and complex logos because it’s built from thread alone, while cut fabric covers large areas with dramatically fewer stitches and keeps the base fabric’s natural drape intact. That distinction is the whole ballgame for anyone weighing appliqué vs embroidery on a production run.
Stitch math, in practice: large solid fills stitch and finish faster in appliqué than in a comparable full embroidery, because the machine is tracing an outline instead of filling a field with satin or tatami stitches. On a batch order, that time savings shows up directly in labor cost per unit.
Materials and Machine Settings You’ll Need for Each Method
Get the setup wrong and both techniques punish you fast, appliqué with fraying and embroidery with puckering.
- Fabric prep: preshrink both the appliqué piece and the base garment before you start; skipping this step is the single most common cause of a warped patch after the first wash.
- Stabilizer: tear-away stabilizer suits stable wovens and light embroidery; cutaway stabilizer holds up better under dense fills or knit fabrics that stretch during stitching.
- Needles and thread: a sharp or embroidery needle in size 75/11 to 90/14 handles most jobs; polyester thread resists fading and holds up to repeated washing better than rayon, which looks glossier but frays sooner.
- Machine settings: satin stitch width and length should scale with your design, narrower and tighter for small appliqué shapes, wider and looser for large borders where coverage matters more than precision.
- Domestic vs embroidery machine: a standard sewing machine with a zigzag stitch handles raw-edge and satin-edge appliqué just fine; true embroidery, especially anything with digitized fill stitches or multi-color logos, needs a dedicated embroidery machine or embroidery module.
Pro Tip: Adjust your bobbin and upper tension slightly for satin-border appliqué so the thread’s interlock point sits just under the fabric instead of on top. It’s a two-minute tweak, and it’s the difference between a clean satin edge and one with visible bobbin thread peeking through.
What Each Technique Looks and Feels Like on a Finished Piece
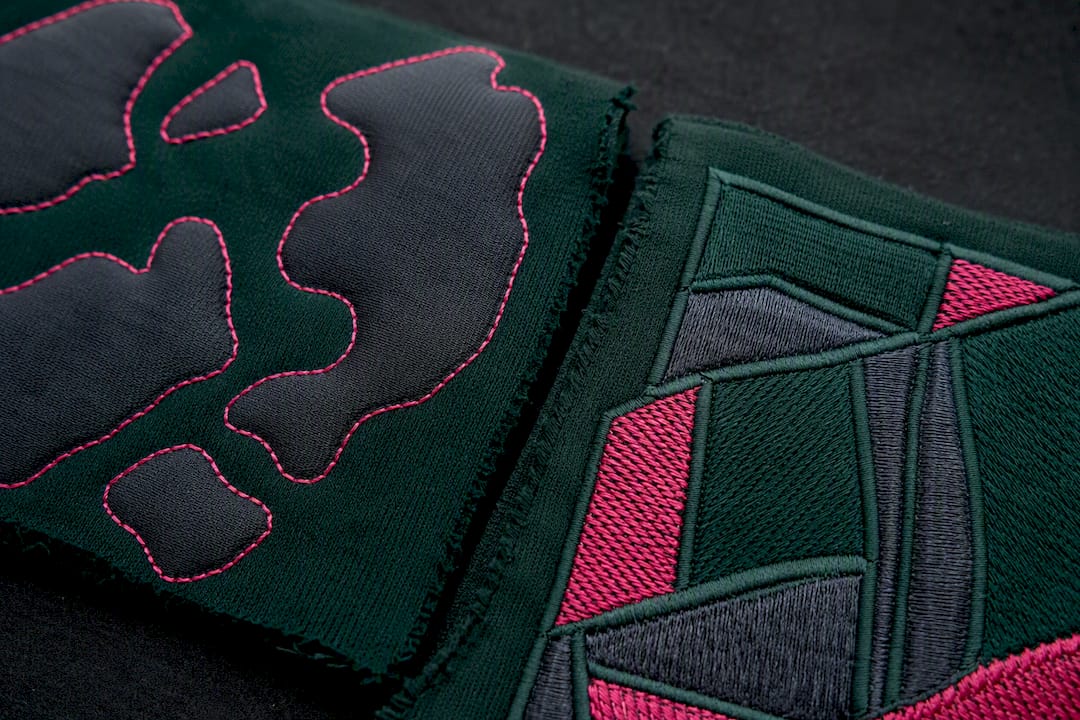
Embroidery reads as integrated. The thread becomes part of the fabric’s surface, which is why it looks so at home on monogrammed linens, polo logos, and refined home goods where a subtle, textured mark beats a loud one. Embroidery also tends to show less visible puckering after repeated washing than appliqué does, which matters for anything that gets laundered often.
Appliqué reads as dimensional. The fabric shape sits slightly raised off the base, giving it a tactile, layered quality that flat thread can’t replicate. That’s exactly why:
- Varsity jackets and letterman patches lean on appliqué for bold chest and sleeve graphics.
- Quilts use appliqué constantly, since piecing large shapes from fabric is faster and cheaper than embroidering the same coverage.
- Kids’ wear favors appliqué for big, graphic characters that need to survive rough play and repeated washing.
Our own board graphics guide covers how graphic scale should drive the decorating method you pick before you even touch a machine.
Weighing Durability, Cost, and Comfort Before You Commit
Durability splits along predictable lines. Appliqué edges can fray over time, especially raw-edge versions without a satin finish, while dense embroidery fill can stiffen the fabric underneath it, which changes how a garment drapes on the body. Neither flaw is fatal, but both should factor into your choice.
| Factor | Embroidery | Appliqué |
|---|---|---|
| Best for | Fine detail, text, logos | Large graphics, color blocks |
| Stitch count | High, scales with detail | Lower, scales with perimeter |
| Fabric feel | Can stiffen with dense fill | Adds bulk but preserves drape |
| Edge risk | Minimal | Can fray if unfinished |
| Typical cost driver | Digitizing + stitch time | Fabric cost + placement time |
A quick decision checklist before you send a design to production:
- Scale and detail: small and intricate points to embroidery; large and bold points to appliqué.
- Fabric type: stretch knits often do better with lighter appliqué borders than heavy satin fill, which can restrict movement.
- Wash frequency: high-wash items favor embroidery’s cleaner post-wash finish or a well-sealed satin-edge appliqué.
- Budget and turnaround: big color areas cost less and move faster as appliqué; fine branding almost always needs embroidery’s precision.
Keeping Appliqué and Embroidery Looking Sharp Over Time
- Wash on cool or warm, never hot, for both techniques; heat accelerates thread breakdown and can loosen fused appliqué bonds.
- Press with a cloth barrier, since direct heat can flatten satin stitching or reactivate fusible web underneath appliqué, causing bubbling.
- Repair early, a frayed appliqué edge gets a quick zigzag pass before it unravels further, and a pulled embroidery thread gets snipped flush and dabbed with fray sealant rather than pulled tight.
Choosing Techniques for Recycled Fabrics and Custom Couture
At Czt, we default to appliqué more often than most decorators would expect, and recycled fabric is the reason why. Reclaimed textiles vary piece to piece in weight and stretch, so preserving drape matters more than usual, and appliqué’s lower stitch density respects that. We reserve embroidery for the moments precision earns its keep: a wordmark, a fine linework logo, a detail our custom couture clients want rendered exactly, not approximated.
Placement planning also cuts scrap. We nest appliqué shapes against a garment pattern before cutting, the same logic behind minimizing offcuts in any recycled-material workflow.
Working with reclaimed fabric taught us that the decoration method isn’t just aesthetic, it’s a waste decision. Appliqué lets a bold graphic sit on a garment without demanding a dense, resource-heavy stitch fill underneath it.
Our Take on the Appliqué vs Embroidery Debate
Most guides treat this as a purely aesthetic choice, satin sheen versus dimensional texture, and stop there. That undersells the real driver: fabric behavior under stress. Embroidery’s dense fill can quietly stiffen a garment in ways that only show up after a few wears, while appliqué’s lighter stitch load tends to age more gracefully on movement-heavy pieces like skate apparel.
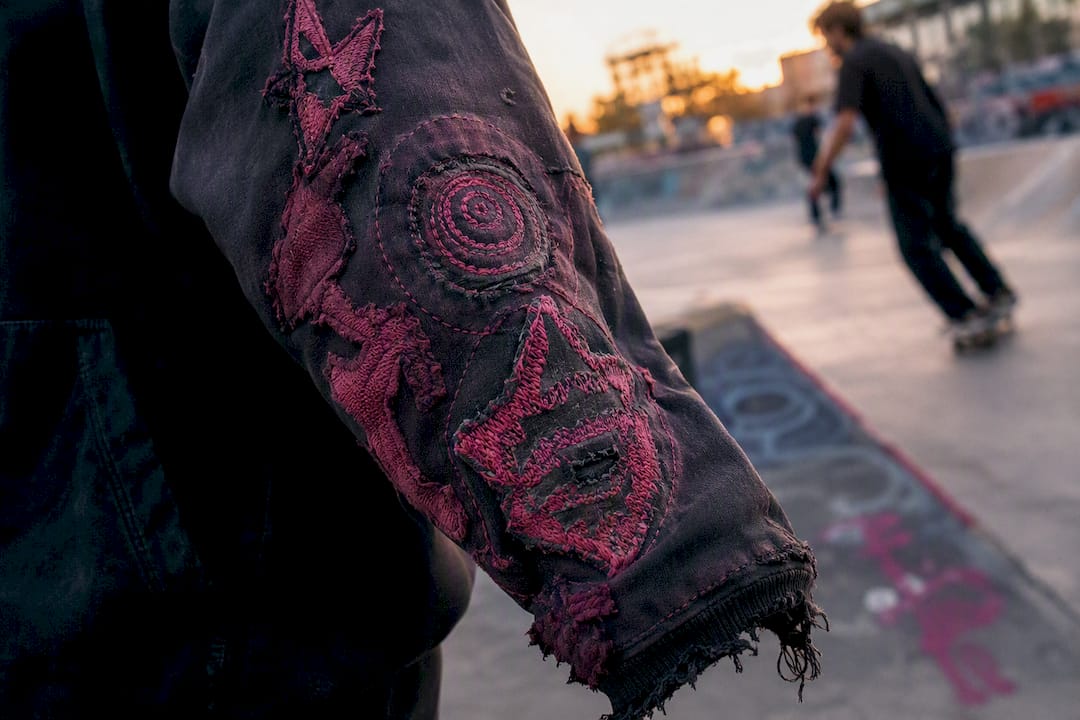
The conventional advice to “pick embroidery for anything that needs to look polished” ignores drape entirely, and drape is what makes a garment wearable rather than just displayable. Our priority order is simple: assess how the fabric needs to move first, then decide how much thread it can carry without losing that movement. Detail comes second to comfort, not the other way around. Readers who flip that order usually end up with a beautiful design on a garment nobody wants to wear twice.
Sources
- Embroidery vs appliqué designs – what’s the difference?
- Appliqué vs. Embroidery, from Application to Aesthetics | Matouk
- Sewing machine appliqué techniques (NMSU extension)
- BERNINA Just SEW It eBook: Appliqué techniques
Recommended
- How Board Graphics Influence Clothing: A Designer’s Guide – CZT [CITI-ZEN-THEORY]
- How to Incorporate Personal Artwork into Clothing – CZT [CITI-ZEN-THEORY]
- DTF vs Screen Printing: Which Method Is Right for You? – CZT [CITI-ZEN-THEORY]
- Best Custom Embroidery Clothing for Sustainable Couture – CZT [CITI-ZEN-THEORY]